
For those of you reading this article, if speeding up Chrome is something you have been longing to find out how to do. Well you have come to the right place, as this article will provide you with a number of effective techniques of doing just that.
Chrome is of course, a web browser developed by Google. Unlike other web browsers, Google Chrome has a very clean and minimalistic design, making it easier for the end user to navigate through and use. Despite all its pluses, it’s not uncommon for users to experience slugging performance while using it. Google Chrome is known for consuming a considerable amount of system memory; however, recent updates have done quite a bit in decreasing memory usage.
Nowadays, the internet is readily available for users on a wide number of platforms, such as SmartPhones, tablets, laptops and PCs, with Google Chrome installed as the default browser. It’s because of its popularity that there are so many methods available to make it faster. A simple search online is enough to reveal many of these effective techniques.
That said, below are just some of the many methods that you can use to make Google Chrome that much faster:
Disable DNS Preloading
This is a significant feature which works simply by caching DNS data, for the purpose of decreasing the amount of time it takes to load a web page. This feature can be useful in most cases, however when the DNS of a website fails to resolve, it can prevent you from accessing that website. Fortunately, it is possible to disable this feature by doing the following:
- First, boot into your computer with administrative rights and load up Google Chrome.
- Then click on the Three Stripes Icon, followed by Settings.
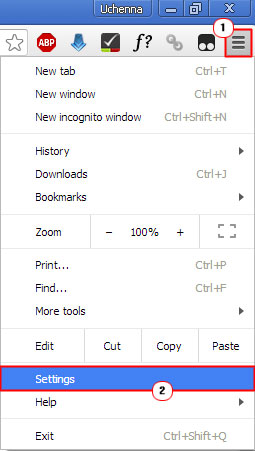
- From the Settings screen, scroll down and click on Show Advanced Settings.

- Navigate to Privacy and then un-tick the boxes next to Use a web service to help resolve navigation errors and Use a prediction service to help complete searches and URLs typed in the app launcher search box or the browser address bar.


Disable Plug-ins
By default, when you install Google Chrome for the first time, it will come with a number of plug-ins, many of which may be of no use to you. The purpose of plug-ins is to allow the browser to carry out functions that it otherwise would not be able to do, however many of this plug-ins you’ll rarely ever use, making their presence on your computer unnecessary.
A plug-in is capable of slowing down browser performance; good thing is it’s possible to disable them. In order to do that, simply do the following:
- First, boot into your computer (with administrative privileges), then load up Google Chrome.
- Once Google Chrome has finished loading up, type about:plugins into the Address Bar and press Enter.


Remove Chrome Extensions
A Chrome extension is essentially a small program designed to improve your web experience. By disabling the extensions that are of little use to you, you should be able to speed up your browser. You can remove these extensions by either right-clicking on its icon and selecting remove, or by navigating through the settings. When you opt to use settings, you’re given more options, such as the ability to disable an extension.
That said, to remove or disable a Chrome extension, simply do the following:
- Boot into your computer as an administrator, then load up Google Chrome.
- From here, type chrome://extensions into the Address Bar and press Enter.


Automatically Clear Browser History
Click and clear is a Chrome Extension that you can download and use to automatically clear your browsing data. It’s a simple install and configuration process. For additional tips on how to this tool, I suggest you consult the program’s manual. Clearing your browser data can be done with just a few clicks of your mouse.
Enable Prefetch Resources
With this feature enabled, the browser will store commonly used JavaScript’s to your computer, so that it can call upon them, when it needs them. This can speed up the loading of certain websites, quite considerably. Anyway, you can enable this feature by doing the following:
Note: If you’re using the latest version of Google Chrome, then this feature should already be enabled.
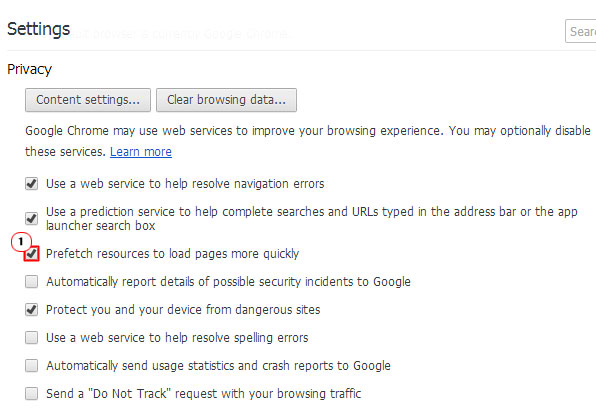
- Navigate to the Privacy Options using steps 1 – 4 of Disable DNS Preloading.
- From here, tick the box next to Prefetch pages to load pages more quickly.
Conclusion
All of these tips should go a long way in ensuring your web browser runs optimally. However in more severe circumstances, you may be forced to reinstall Google Chrome. That said, I recommend you give these tips a try, beforehand, as I’m sure you will not be disappointed.
Uchenna Ani-Okoye is a former IT Manager who now runs his own computer support website www.compuchenna.co.uk.