

The use of React to build applications is growing daily and if you have tried it out or even have some experience with it, you’ll agree that simplifying user management goes a long way in easing your load.
To help you figure out how to incorporate end-to-end user management in your React application, in this article, we will be discussing four key parts of it: registration, authentication, the administration portal, and the user profile.
In this demo, we will be using a free tool that I have found to be quite handy: Frontegg. You may have used its LoginBox builder and so are familiar with its user-friendly builder interface. If not, this is a great opportunity to check them out. What makes this tool ideal for this demo is that most common user management techniques have already been provided by Frontegg, so we’ll mostly implement the feature by simply enabling them in the builder section.
End-to-End User Management
Registration or User Sign up


First, we will be configuring the Login Box within the builder interface. We can easily enable the registration by turning on “Allow signup” within the Signup section. Without creating a cumbersome process for building a registration form for your application, Frontegg helps developers make a fast sign-up form. Don’t forget to publish if you want to see the signup form when testing within the portal.
SignUp Form


Again, within the Login Box section within the builder interface, we can easily configure the authentication form we want to integrate into our application. As of now, passwords are still used to authenticate users. That’s why, in our login form, we’ll be adding a password input type for user authentication.
To enable authentication with the password, we need to go to the “Email sign-on” section and choose “Password”. This will reflect automatically within the preview section.


For the password complexity and identity protection of your authentication form, we can go to “App Settings” and configure the password complexity and identity protection of the authentication form. For password complexity, we can choose between easy, medium, and hard.


Moreover, we can also add some additional features like email verification.


For identity protection, we can set up the recaptcha with a minimum score-based validation of 0.5 but you may increase the value based on your needs.

Let’s see some of the outputs that will come when these settings are published.
Login or Authentication Form with Password
Login Form Password Complexities


Reset Password Complexities


User Profile


In the “Profile” tab within “Builder interface”, we can set up user profile management. This module actually helps users manage their profile and account settings. Additionally, they can also set up their privacy settings and security settings as well as generate and manage personal tokens.
However, we’re just going to focus on the profile settings and account settings. It is very easy to enable these two modules. We just need to turn it on.

Before we see the sample code for forgotten passwords, admin portal integration, and authorization, we need to publish all the settings we have set up.
Code Integration
In this section, we’ll see code integration. I do assume that you already have knowledge of how to create a React project. You’ll see the login box, admin portal integration, and most of the user management settings that we have set up in the previous section.
The code below helps you easily integrate the configured authentication from the Login Box.
This code should be implemented inside your index.js.
import React from ‘react’;
import ReactDOM from ‘react-dom/client’;
import ‘./index.css’;
import App from ‘./App’;
import reportWebVitals from ‘./reportWebVitals’;
import { FronteggProvider } from ‘@frontegg/react’;
const contextOptions = {
baseUrl: ‘https://app-6r9659eqeiny.frontegg.com’,
clientId: ‘put your clientid here’
};
const root = ReactDOM.createRoot(document.getElementById(‘root’));
root.render(
<FronteggProvider contextOptions={contextOptions} hostedLoginBox={true}>
<App />
</FronteggProvider>
);
// If you want to start measuring performance in your app, pass a function
// to log results (for example: reportWebVitals(console.log))
// or send to an analytics endpoint. Learn more: https://bit.ly/CRA-vitals
reportWebVitals();
Now, we need to show how we can utilize the admin portal and the ability to log out.
import ‘./App.css’;
import { useEffect } from ‘react’;
import { ContextHolder } from ‘@frontegg/rest-api’;
import { useAuth, useLoginWithRedirect } from “@frontegg/react”;
import { AdminPortal } from ‘@frontegg/react’;
function App() {
const { user, isAuthenticated } = useAuth();
const loginWithRedirect = useLoginWithRedirect();
useEffect(() => {
if (!isAuthenticated) {
loginWithRedirect();
}
}, [isAuthenticated, loginWithRedirect]);
const logout = () => {
const baseUrl = ContextHolder.getContext().baseUrl;
window.location.href = `${baseUrl}/oauth/logout?post_logout_redirect_uri=${window.location}`;
};
return (
<div className=”App”>
{isAuthenticated ? (
<div>
<div>
<img src={user?.profilePictureUrl} alt={user?.name} />
</div>
<div>
<span>Logged in as: {user?.name}</span>
</div>
<div>
<button onClick={() => alert(user.accessToken)}>What is my access token?</button>
</div>
<div>
</div>
<button onClick={() => { AdminPortal.show(); }}>Admin Portal</button>
<div>
<button onClick={() => logout()}>Click to logout</button>
</div>
</div>
) : (
<div>
<button onClick={() => loginWithRedirect()}>Click me to login</button>
</div>
)
}
</div >
);
}
export default App;
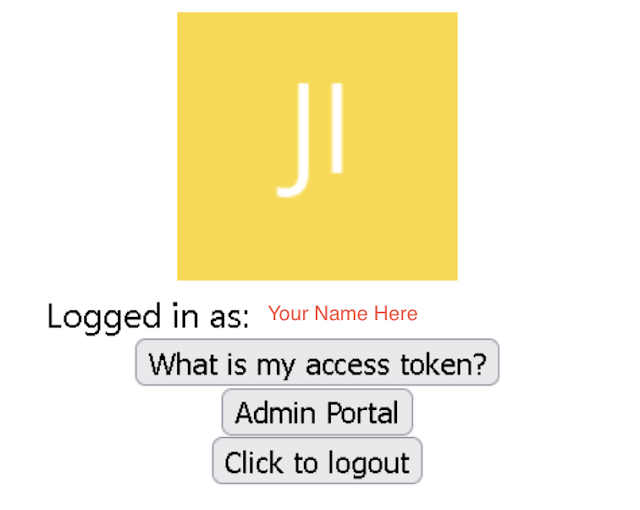
After successful integration and authenticating, we’ll see something similar to this.
To see the admin portal administration, just click the “Admin Portal” button and we’ll see the user profile module that we have enabled.
Once you have successfully entered your profile, you should be able to see your account details, security information, and audit logs. Not only that, but you can also change or update your account details.
Conclusion
In this article, we discussed end-to-end user management by configuring the following modules: registration, authentication, administration portal, and user profile. After that, we learned how to integrate the Frontegg “Login Box” and “Admin Portal” into our React application. Overall, implementing end-to-end user management for new applications can be really easy if you have the right tools and a good grasp of login flows.
Until next time, happy programming!